큐브를 지정된 장소에 옮기는 3D게임을 만들겠습니다.
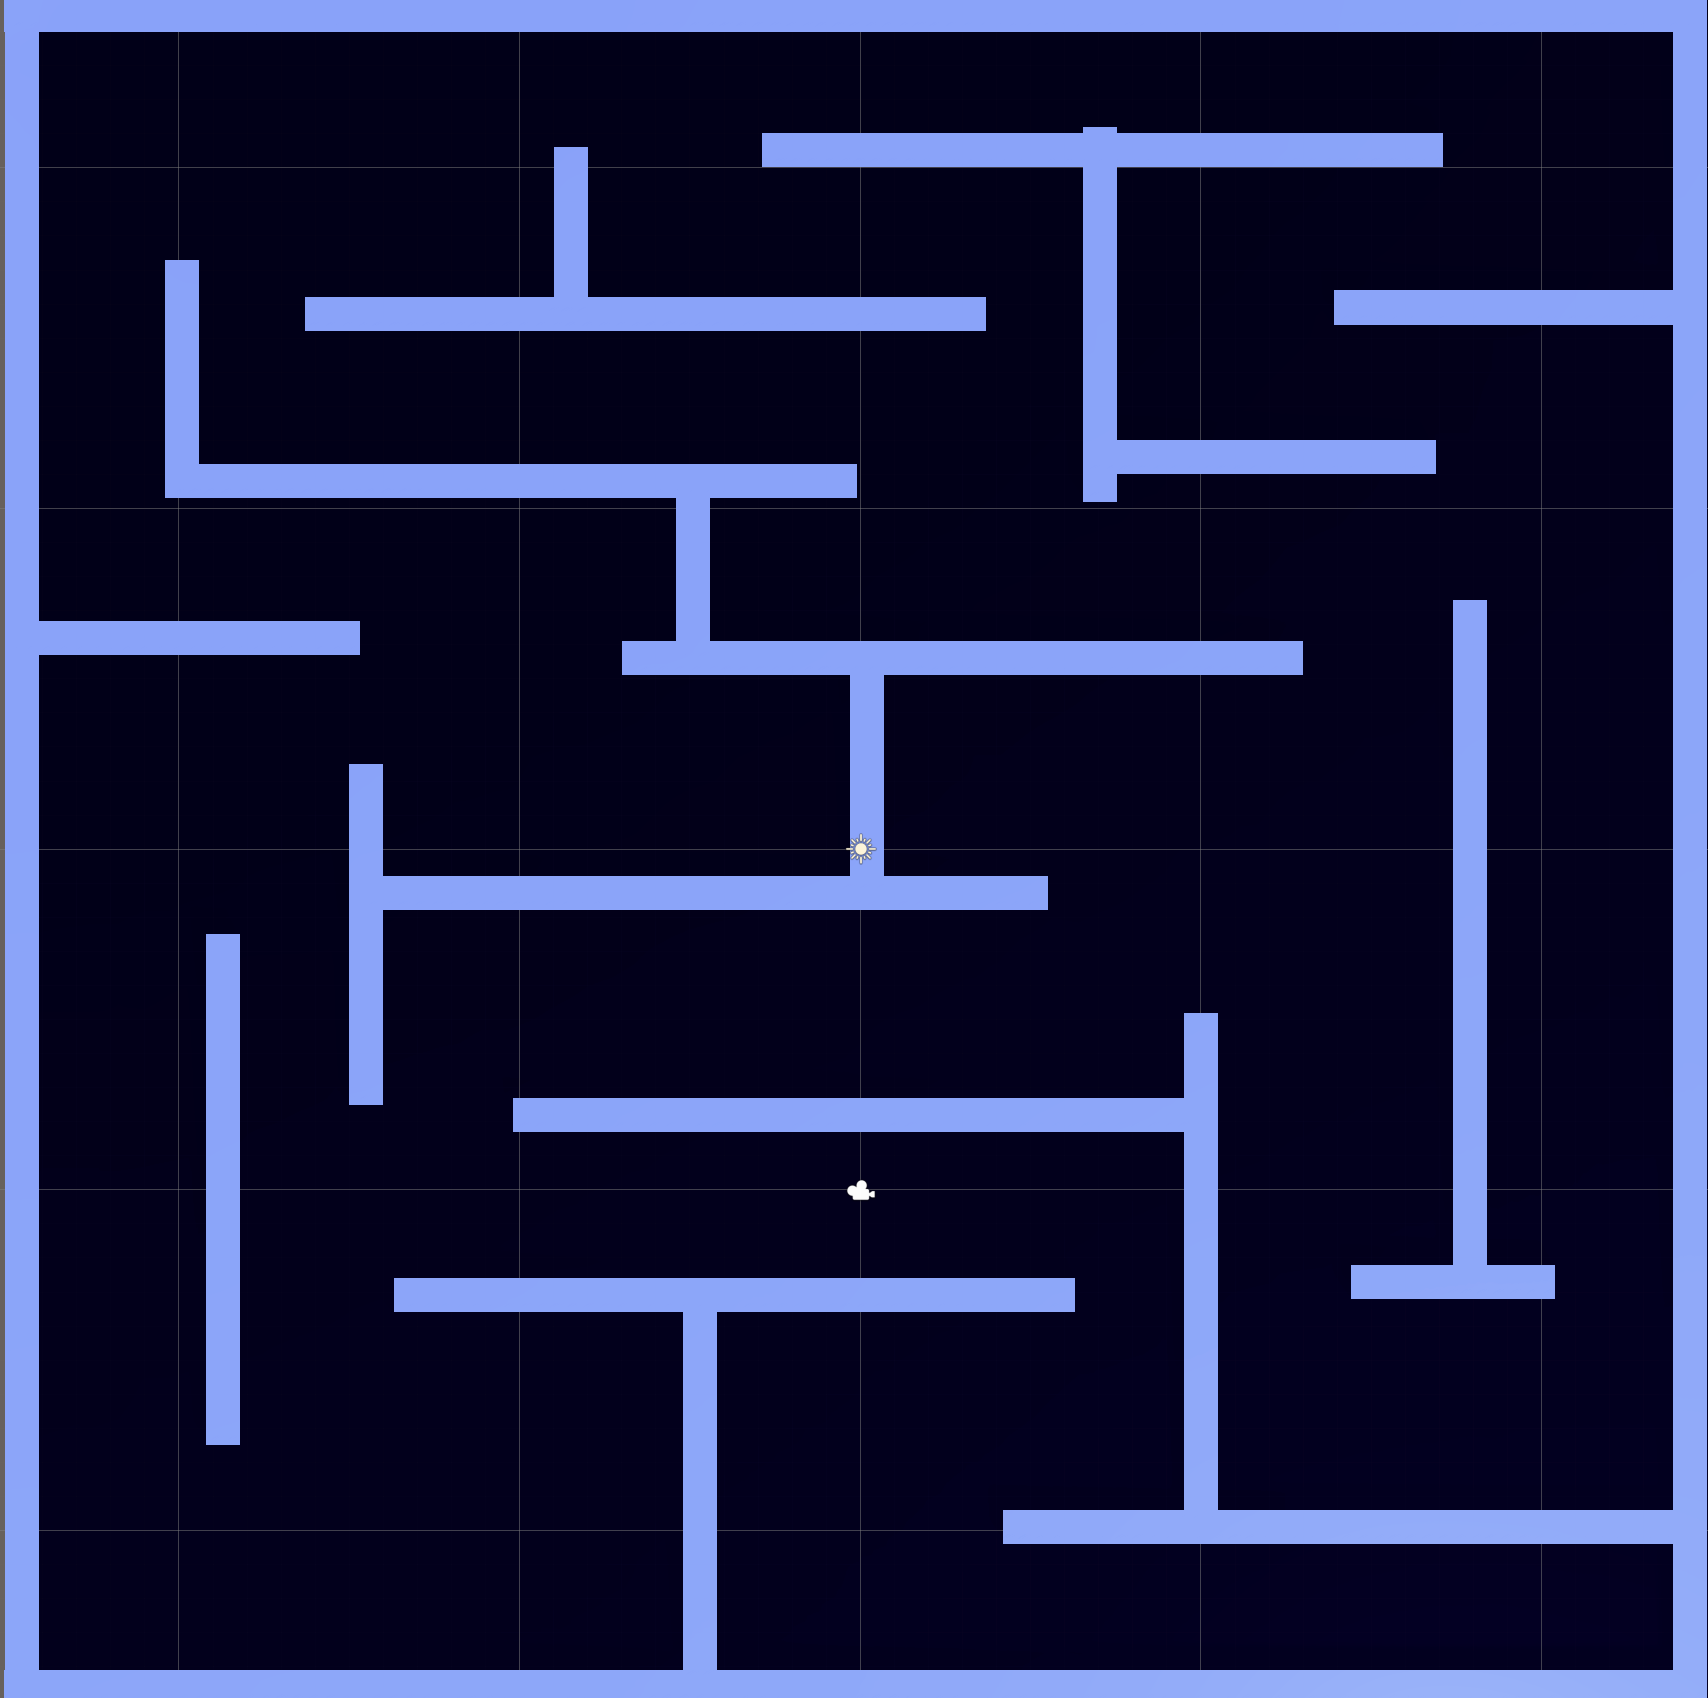
1. Plan과 큐브로 맵을 만듧니다. 복잡할수록 어렵겠죠?
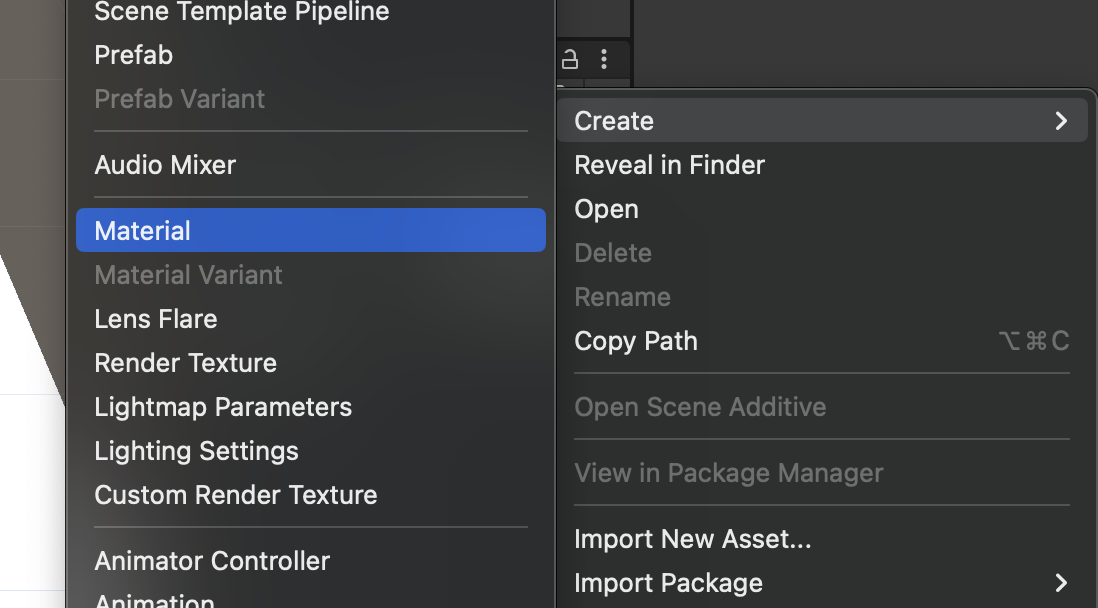
메테리얼을 만들어서 색도 입혀주세요.
Project > 우클릭 > Creat > Material
3D 맞습니다.
* 카메라 조정
위치이동시키고 회전 바꿔도 되지만 씬화면에서 보이는 모습으로 게임화면을 바꾸는 단축키 입니다.
카메라위치 Scen화면으로 바꾸는 단축키 : Ctrl + Shift + F. (Mec은 Command + Shift + F)
2. 플레이어 만들기
캡슐로 플레이어를 만들게요. 크기 조절하고 리기드바디랑 실린더 콜리더 넣어주시고 메테리얼 추가해서 색을 바꿔주세요.
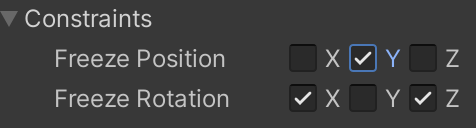
큐브나 실린더로 만들면 넘어질일 없지만 캡슐이 귀여우니 캡슐로 할게요. 대신 리기드바디의 x,y축 회전을 막아 주세요.
Rigidbody > Constraints > Freeze Roration
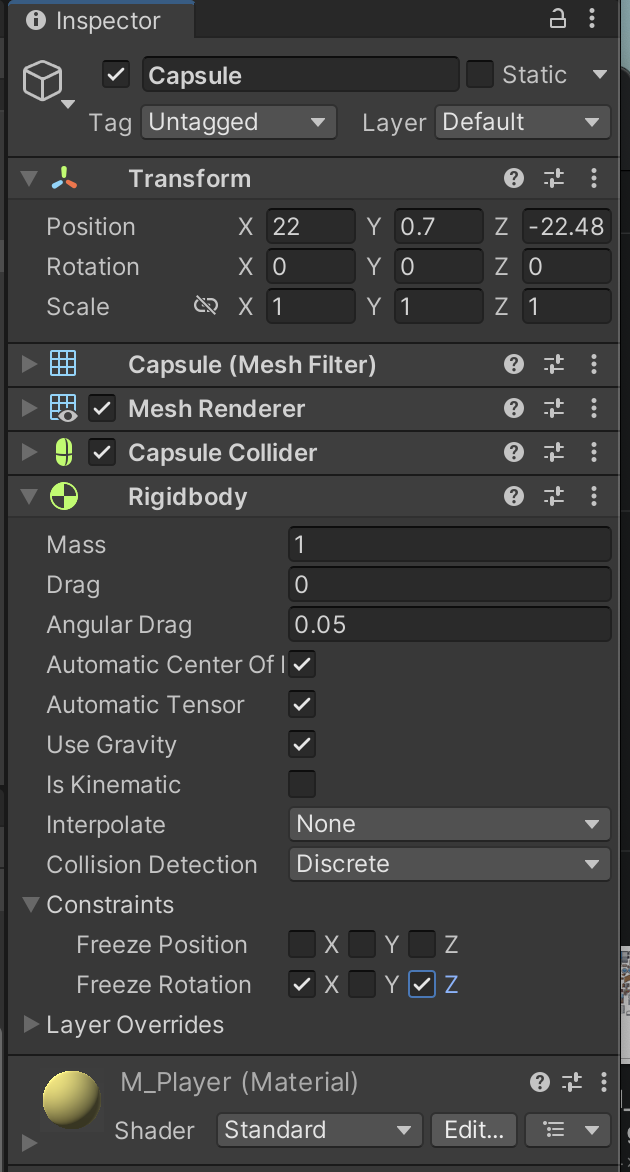
바닦과 벽에 콜리더가 없다면 추가해주세요.
플레이어의 움직임을 위한 스크립트를 만들게요.
첫번쨰는 PC에서 화살표키로만 움직이는 코드고.
두번째는 WSAD키로도 움직일 수 있게 Horizontal과 Vertical을 이용했어요.
둘다 결과는 같으니 아무거나 선택해서 사용하세요.
using System.Collections;
using System.Collections.Generic;
using UnityEngine;

public class PlayerController : MonoBehaviour
{
    Rigidbody playerRigidbody;
    public float speed; // 이동속도

    private void Start()
    {
        // 컴포넌트 알아서 찾으라고 적어놓음
        playerRigidbody = GetComponent<Rigidbody>();
    }
    void Update()
    {
        if (Input.GetKey(KeyCode.UpArrow) == true)
        {
            playerRigidbody.AddForce(0f, 0f, speed);
        }
        if (Input.GetKey(KeyCode.DownArrow) == true)
        {
            playerRigidbody.AddForce(0f, 0f, -speed);
        }
        if (Input.GetKey(KeyCode.RightArrow) == true)
        {
            playerRigidbody.AddForce(speed, 0f, 0f);
        }
        if (Input.GetKey(KeyCode.LeftArrow) == true)
        {
            playerRigidbody.AddForce(-speed, 0f, 0f);
        }
    }

    public void Over()
    { // 자신(플레이어)의 게임 오브젝트 비활성화
        gameObject.SetActive(false);
    }
}
using System.Collections;
using System.Collections.Generic;
using UnityEngine;

public class PlayerController : MonoBehaviour
{
    Rigidbody playerRigidbody;
    public float speed; // 이동속도

    private void Start()
    {
        // 컴포넌트 알아서 찾으라고 적어놓/
        playerRigidbody = GetComponent<Rigidbody>();
    }
    void Update()
    {
        // 수평축과 수직축의 입력값을 감지하여 저장
        float xInput = Input.GetAxis("Horizontal");
        float yInput = Input.GetAxis("Vertical");

        // 실제 이동속도를 입력값과 이동속도를 사용해 결정
        float xSpeed = xInput * speed;
        float ySpeed = yInput * speed;

        // Vector 속도를 (xSpeed, 0, ySpeed)로 생성
        Vector3 newVelocity = new Vector3(xSpeed, 0, ySpeed);
        // Rigidbody의 속도에 newVelocity 할당
        playerRigidbody.velocity = newVelocity;
    }

    public void Over()
    { // 자신(플레이어)의 게임 오브젝트 비활성화
        gameObject.SetActive(false);
    }
}
Shift 누르면 빨라지게 하고 싶으시면 Update안에 if문 추가해주세요
        if (Input.GetKey(KeyCode.LeftShift) == false && Input.GetKey(KeyCode.RightShift) == false)
        {
            newSpeed = speed;
        }
        if (Input.GetKey(KeyCode.LeftShift) == true || Input.GetKey(KeyCode.RightShift) == true)
        {
           newSpeed = 2 * speed;
        }
플레이어의 컴포넌트로 추가해주시고
속도는 실행시켜보고 적당하게 적어주세요.
실행시켰을 떄 플레이어가 의도와 다른방향으로 움직인다면 카메라의 좌표축을 이동방향에 맞게 옮겨주세요.
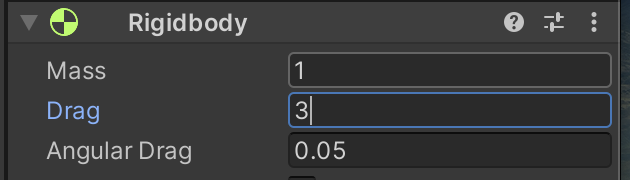
플레이어가 미끄러진다면 플레이어의 마찰저항을 조절해주세요.
Player > Rigidbody > Drag
3. 옮길 박스를 만들게요
큐브에 리기드바디랑 메테리얼을 추가해주세요.
재생해보면 밀때마다 큐브가 막 굴러다닐거에요. 이걸 막으려면 플레이어처럼 큐브의 회전을 막으세요. y축의 회전도 막으면 실수로 박스를 벾에 붙였을 때 때어내기가 어려워서 박스가 옆으로는 돌 수 있도록 y축 회전은 풀어뒀습니다.
그리고 박스가 벽 너머로 넘어가는 불상사를 막기 위해 Y값을 고정할게요.
4. 도착지점 만들기
박스를 이동시킬 도착지점을 만들게요.
먼저 도착지점을 표시할 큐브를 만들고 메테리얼을 추가해주세요.
콜라이더에 트리거를 체크해주세요
메테리얼은 눈에 잘 띄이는 색으로 해주세요. 크기는 박스보다 작게, 눈에 잘 띄이도록 회전시켜주셔도 좋아요.
아래 코드를 목적지 표시에 넣어주세요
using System.Collections;
using System.Collections.Generic;
using UnityEngine;

public class Rotator : MonoBehaviour
{
    float rotateSpeed;

    void Update()
    {
        rotateSpeed = 60 * Time.deltaTime;
        float r = rotateSpeed;
        transform.Rotate(r, r, r);
    }
}
5. 도착확인 및 게임 종료
박스가 도착지에 도착한것을 알기위한 스크립트를 만들게요. 아래 스크립트를 옮기는 상자에 넣어주세요.
using System.Collections;
using System.Collections.Generic;
using UnityEngine;

public class ItemBox : MonoBehaviour
{
    Renderer myRenderer;
    Color originalColor;
    public Color Color;

    // Start is called before the first frame update
    void Start()
    {
        myRenderer = GetComponent<Renderer>();
        originalColor = myRenderer.material.color; // 원래색 가져오
    }

    // Update is called once per frame
    void Update()
    {

    }


    private void OnTriggerEnter(Collider other)
    { // 닿은 순간
        if(other.tag == "Destination")
        {
            // 변하는 색 코드에서 지정
            // myRenderer.material.color = Color.grey;
            myRenderer.material.color = Color;// 인스펙터창에서 색 지정

            Debug.Log("목적지 도착!");
        }
    }

    private void OnTriggerExit(Collider other)
    { // 떨어진 순간
        if (other.tag == "Destination")
        {
            myRenderer.material.color = originalColor; // 색 복구
        }
    }

    private void OnTriggerStay(Collider other)
    { // 닿아있는 동안
        if (other.tag == "Destination")
        {
            myRenderer.material.color = Color;
        }
    }
}
ItemBox와 Destination테그를 만들어 옮기는 큐브는 ItemBox로, 도착지점은 Destination로 테그를 바꿔주세요
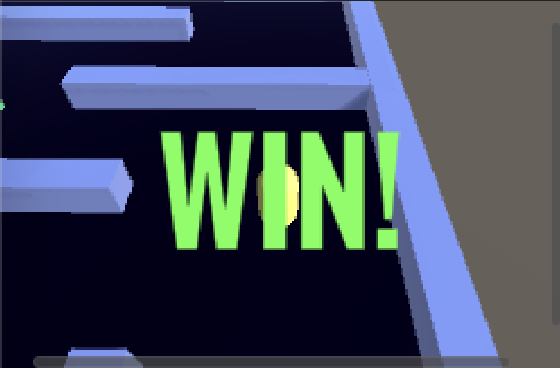
6. 게임 승리
승리 UI와 UI를 띄우기 위한 코드를 만들게요.
하이라키 > 우클릭 > UI에서 적당히 만드세요
전 텍스트만 넣었습니다. 인스펙터창에서 비활성시켜주세요.
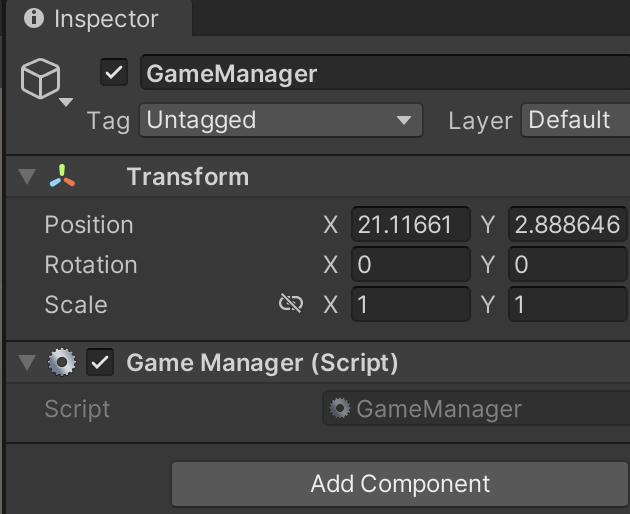
빈 개임오브젝트를 만들어서 GameManager.cs 를 넣어주세요
using System.Collections;
using System.Collections.Generic;
using UnityEngine;

public class GameManager : MonoBehaviour
{
    public GameObject winUI;
    public ItemBox[] itemBoxes;
    public bool isGameOver;

    void Start()
    {
        isGameOver = false;
    }

    // Update is called once per frame
    void Update()
    {
        if(isGameOver == true)
        {
            return;
        }

        int count = 0;
        for (int i = 0 ; i < 4; i++) // 도착지 수에따라 달라짐
        {   // ItemBox.cs에 public bool isOveraped = false; 추가
            if (itemBoxes[i].isOveraped == true)
            {
                count++;
                Debug.Log("+1");
            }
        }

        if(count >= 4)
        {
            Debug.Log("게임 승리!");
            isGameOver = true;
            winUI.SetActive(true);// UI활성
        }
    }
}
isOveraped를 사용하기 위해 ItemBox.cs도 수정해주세요.
using System.Collections;
using System.Collections.Generic;
using UnityEngine;

public class ItemBox : MonoBehaviour
{

    public bool isOveraped = false;

-- 생략 --

    private void OnTriggerEnter(Collider other)
    { // 닿은 순간
        if(other.tag == "Destination")
        {

            // myRenderer.material.color = Color.grey;// 변하는 색 코드에서 지정
            myRenderer.material.color = Color;// 인스펙터창에서 색 지정
            isOveraped = true;
            Debug.Log("목적지 도착!");
        }
    }
    --- 생략---
}
7. 백스페이스바 누르면 재시작하는 기능추가
using System.Collections;
using System.Collections.Generic;
using UnityEngine;
using UnityEngine.SceneManagement; // 씬 이동

 ------------ 셍략 -----------------
    // Update is called once per frame
    void Update()
    {
        if (Input.GetKeyDown(KeyCode.Backspace))
        {
            SceneManager.LoadScene("Cube");
        }
 ------------ 셍략 -----------------
난이도를 높이려면 아이템박스와 도착지 수를 늘리거나 화면을 확대하고 카메라가 플레이를 따라다니게 만드는 등 맵 일부만 보이게 만드는 방법도 있습니다.
플레이어 따라다니는 카메라는 하이라키창의 카메라를 플레이어에게 넣어주고 위치조절하기면 되요. 이때 플레이어 y축회전도 막아주세요. 안막으면 화면이 회전합니다.
https://www.youtube.com/watch?v=JUgeek8IS88
유니티 처음 접했을 때 만들었던거
코드
'UNITY > Unity Study' 카테고리의 다른 글
| Unity 인터페이스 탐색과 기초 조작법 (0) | 2025.05.28 |
|---|---|
| UNREAL/UE 5.4 웨비나 - 2주차 - 라이트 (0) | 2024.05.09 |
| 시간내에 목적지 도달하기 (0) | 2023.08.30 |
| FurBall의 탈출기 (0) | 2023.08.23 |
| 화살피하기 Unity 2D (0) | 2023.08.22 |

