728x90
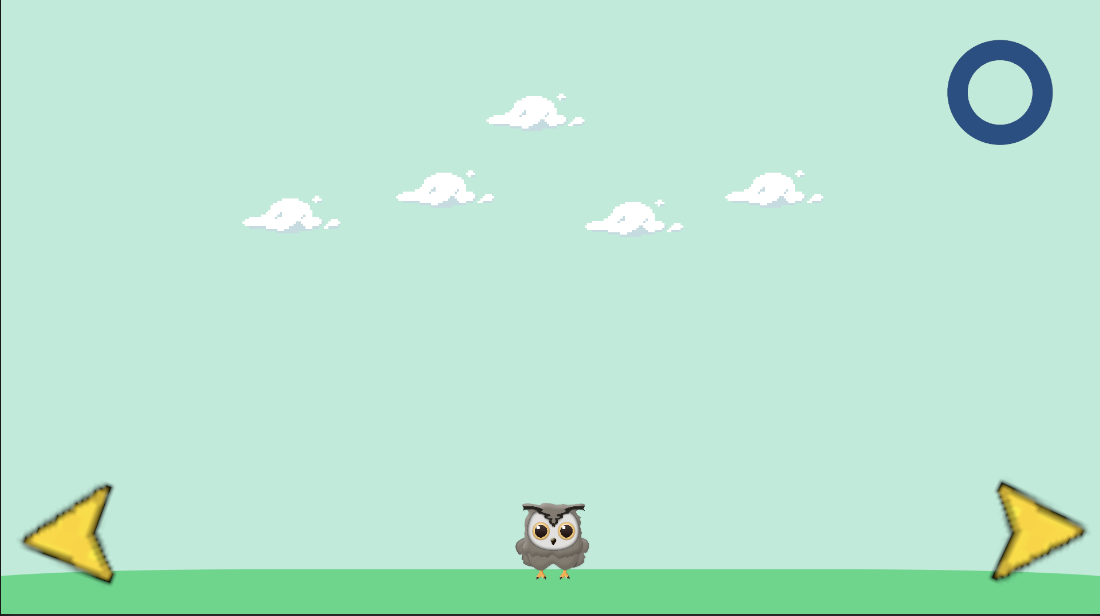
부엉이가 화살피하는 2D 게임을 만들거에요.
먼저 사용할 오브젝트를 꺼내주세요.
배경은 레이어 0, 부엉이랑 화살은 1로 할게
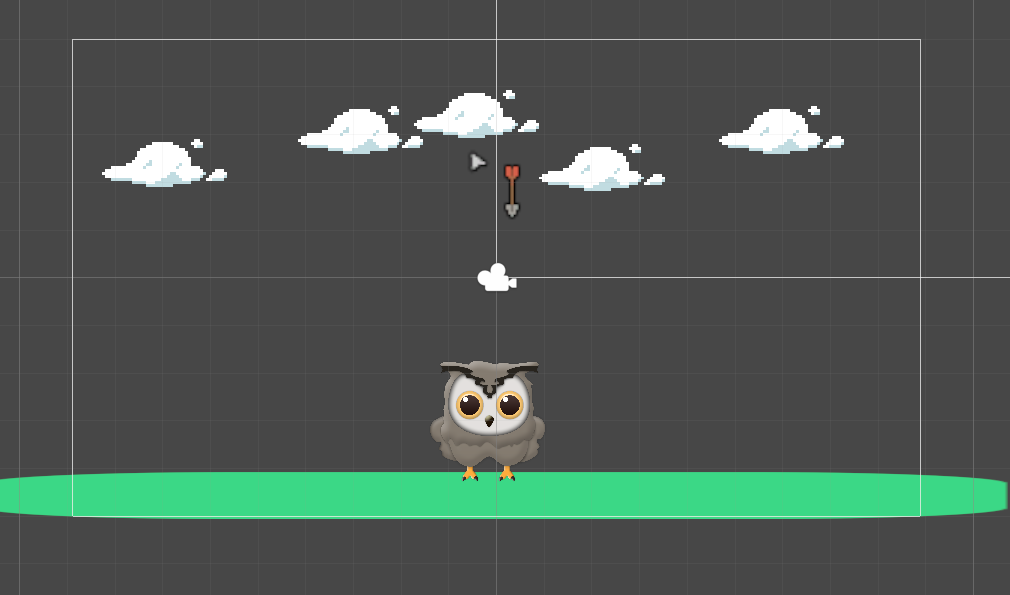
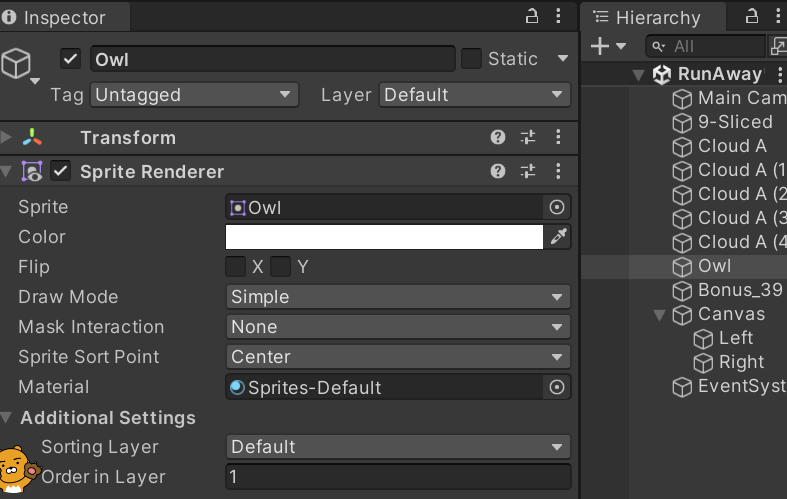
부엉이가 오른쪽 화살표를 누르면 오른쪽으로, 왼쪽화살표는 왼쪽으로 움직이게 하는 스크립트(OwlController.cs)를 부엉이 오브젝트에 추가해주세요
using System.Collections;
using System.Collections.Generic;
using UnityEngine;

public class OwlController : MonoBehaviour
{
    // Start is called before the first frame update
    void Start()
    {
        Application.targetFrameRate = 60;
    }

    // Update is called once per frame
    void Update()
    {
        // 왼쪽으로 3
        if (Input.GetKeyDown(KeyCode.LeftArrow))
        {
            transform.Translate(-3,0,0);
        }
        // 오른쪽으로 3
        if ( Input.GetKeyDown(KeyCode.RightArrow)) {
            transform.Translate(-3,0,0);
        }
    }
}
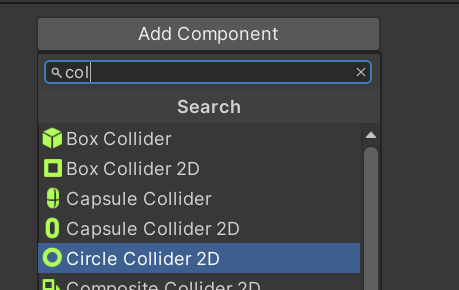
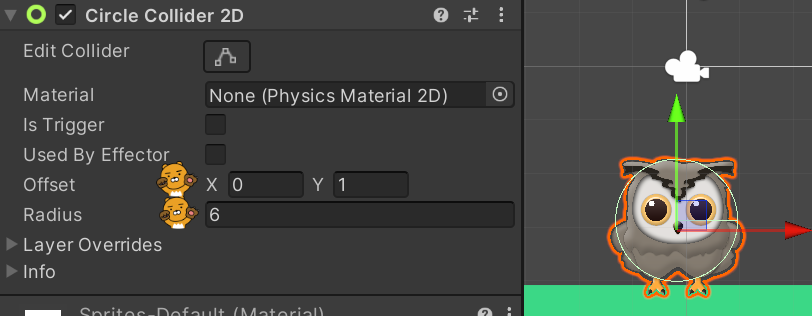
부엉이에게 Circle Collider 2D컴포넌트를 추가하고 부엉이 크기에 맞게 수정하세요.
Offeet은 위치
Radius는 콜리더 원의 반지름 입니다.
이제는 하늘에서 내려올 화살을 만들게요.
ArrowController.cs를 화살에 넣어주세요.
재생해보고 화살 속도가 너무 빠르거나 느리면 조절해 주세요
화살에 Capsule Collider 2D 컴포넌트를 추가하고 화살 크기에 맞게 조절해주세요.
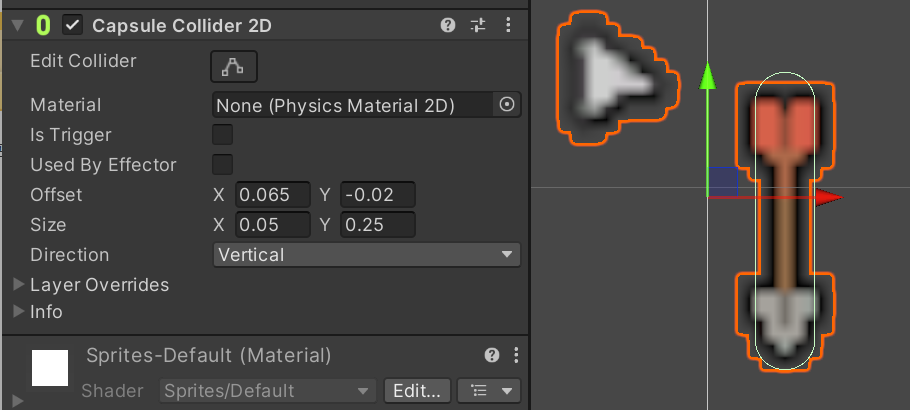
화살이 부엉이에게 닿으면 충돌사실을 알 수 있도록 ArrowController.cs를 수정하겠습니다.
using System.Collections;
using System.Collections.Generic;
using UnityEngine;

public class ArrowController : MonoBehaviour
{
    public GameObject player;

    void Update()
    {
        // 화살을 프레임마다 등속으로 낙하시킵니다.(플레이어에서 1초에 60프레임으로 제한걸었습니다.)
        transform.Translate(0, -0.6f, 0);


        // 화면 밖으로 나간 화살을 제거합니다.
        if (transform.position.y < -9.0f ) // 게임 화면에 맞게 조절하세요
        {
            Destroy(gameObject);
            // Destroy
            // 사용 예시 : void Object.Destroy(Object obj, float t)
            // Removes a GameObject, component or asset.
        }

        // 충돌 판정
        Vector2 p1 = transform.position;
        Vector2 p2 = this.player.transform.position;
        Vector2 dir = p1 - p2;
        Debug.Log(dir);
        float d = dir.magnitude;

        if(d< 1)
        {
            Debug.Log("충돌");
            // 충돌할 경우 화살을 지웁니다.
            Destroy(gameObject);
        }
    }

}
화살을 프리펩으로 만듭니다.
하이라키창의 화살을 플젝트창으로 드레그앤 드롭 하시면 되요. 파일명을 arrowPrifab으로 바꿔주세요
이제 화살이 자동생성되도록 만들거에요.
ArrowGenerator.cs
using System.Collections;
using System.Collections.Generic;
using UnityEngine;

public class ArrowGenerator : MonoBehaviour
{
    public GameObject arrowPrefeb; // 화살 프리팹을 저장할 변수
    float span = 1.0f; // 화살 생성 간격
    float delta = 0; // 누적 시간을 저장할 변수

    // Update is called once per frame
    void Update()
    {
        this.delta += Time.deltaTime; // 누적 시간 갱신
        // Time.deltaTime   1초에 한번씩

        // 일정 간격마다 화살 생성
        if (this.delta > this.span)
        {
            this.delta = 0; // 누적 시간 초기화
            GameObject go = Instantiate(arrowPrefeb);
            // 화살 프리팹을 복제하여 새로운 GameObject 생성
            int px = Random.Range(-15, 15);
            // 화면 좌우 끝에서 랜덤한 x 좌표 선택
            go.transform.position = new Vector3(px, 9, 0);
            // 생성한 화살의 위치 설정 (화면 위쪽 밖)
        }
    }
}
빈 오브젝트를 만들고 이름을 ArrowGenerater로 바꿔주세요.
ArrowGenerator.cs 스크립트를 넣고 위에서 만든 화살 프리펩을 Arrow Prefeb에 넣어주세요
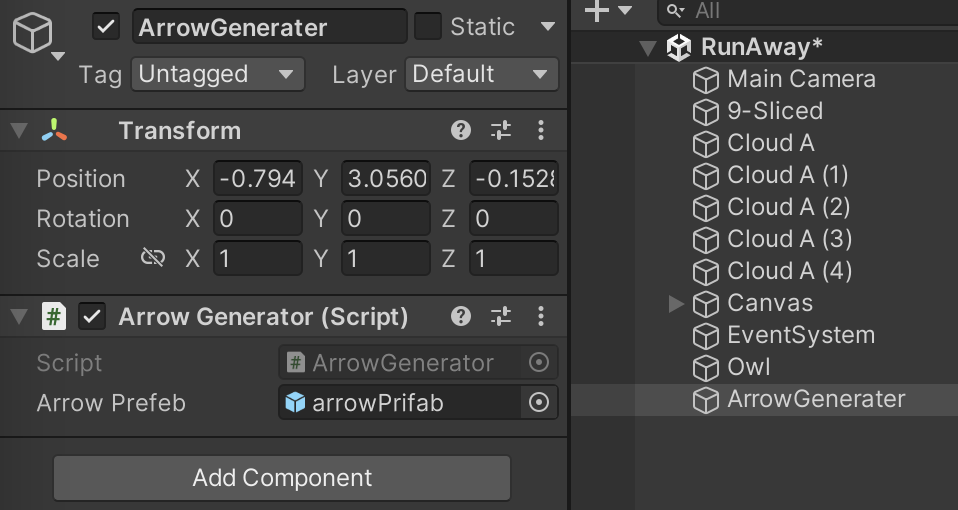
화살이 랜덤한 위치에서 잘 떨어지는지 확인해주세요
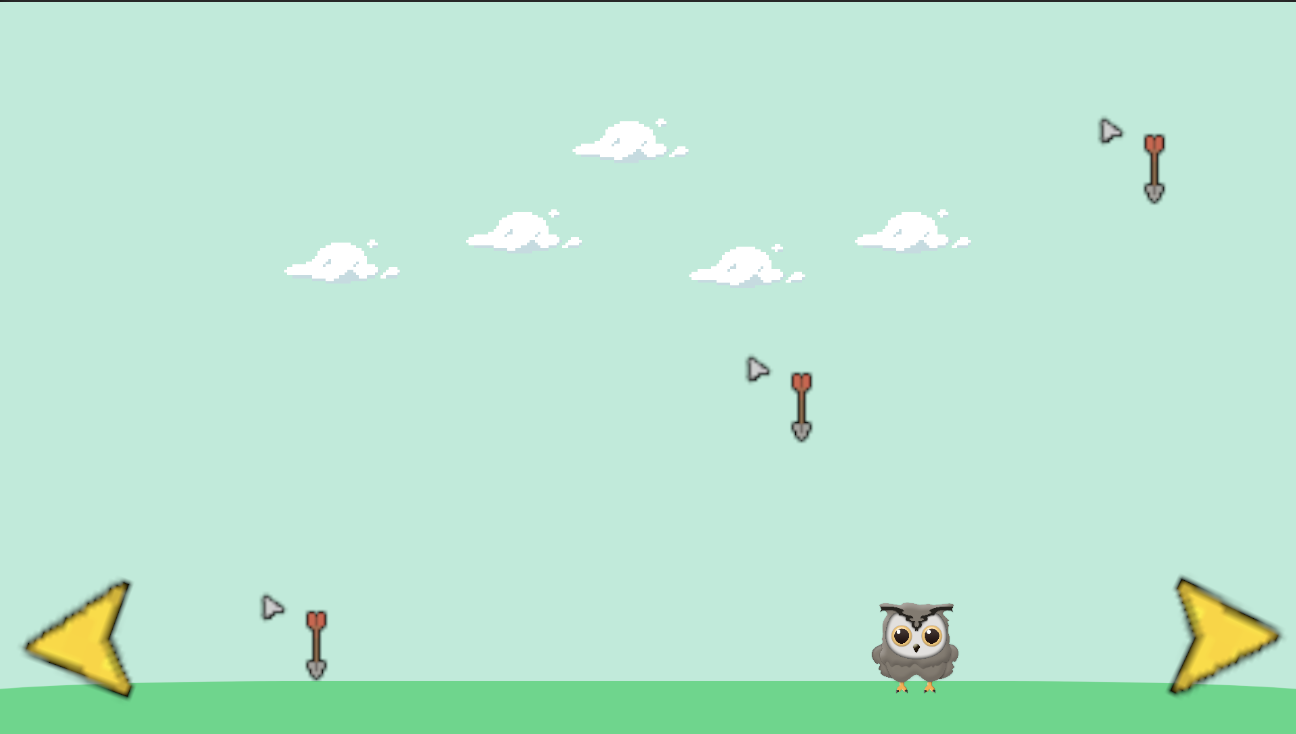
UI 이미지로 부엉이의 체력을 표시해줄게요
UI 이미지에 체력 이미지를 넣고 객체명을 'HpGauge'로 바꾸세요 적당한 위치로 옮겨주세요
Image 컴포넌트에서 아래처럼 수정해주세요.
Image Type : Filled
Fill Method : Radial360
Fill Origin : Top

Fill Method에서
Horizontal은 가로 방향으로 이미지를 잘라내요
Vertical은 세로 방향으로 이미지를 잘라내고
Radial 90, 180, 360 은 각도에 따라 이미지를 잘라내요 한번씩 해보세요.
HpGauge를 제어하는 코드를 빈 오브젝트(GameDirector)에 넣으세요
using UnityEngine;
using UnityEngine.UI;

public class GaimDirectorOwl : MonoBehaviour
{
    public Image hpGauge; // Change the variable type to Image

    // Start is called before the first frame update
    void Start()
    {
        // Make sure the HpGauge object is assigned in the Inspector
        if (hpGauge == null)
        {
            Debug.LogError("HpGauge is not assigned!");
        }
    }

    public void DecreaseHp() // Corrected the method name
    {
        // Decrease the fill amount by 0.1f, but make sure it doesn't go below 0
        hpGauge.fillAmount = Mathf.Max(hpGauge.fillAmount - 0.1f, 0f);
    }
}
HpGaue칸에 UI이미지인 HpGauge를 넣어주세요.
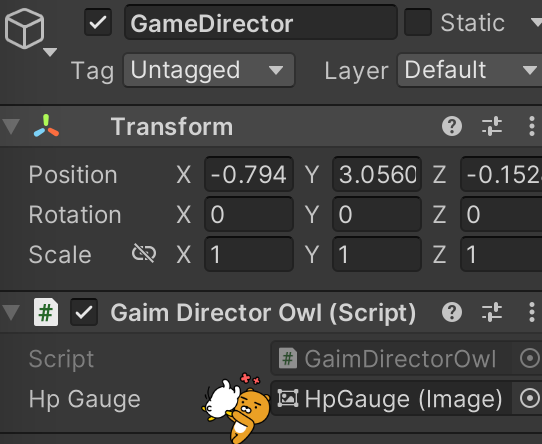
화살에 맞으면 체력이 깎이도록 ArrowController.cs코드를 코칠게요.
using System.Collections;
using System.Collections.Generic;
using UnityEngine;

public class ArrowController : MonoBehaviour
{
    GameObject player;
    void Start()
    {
        this.player = GameObject.Find("Owl");
    }

    void Update()
    {
        // 화살을 프레임마다 등속으로 낙하시킵니다.(플레이어에서 1초에 60프레임으로 제한걸었습니다.)
        transform.Translate(0, -0.06f, 0);


        // 화면 밖으로 나간 화살을 제거합니다.
        if (transform.position.y < -9.0f ) // 게임 화면에 맞게 조절하세요
        {
            Destroy(gameObject);
            // Destroy
            // 사용 예시 : void Object.Destroy(Object obj, float t)
            // Removes a GameObject, component or asset.
        }

        // 충돌 판정
        Vector2 p1 = transform.position;
        Vector2 p2 = this.player.transform.position;
        Vector2 dir = p1 - p2;
        // Debug.Log(dir);
        float d = dir.magnitude;

        if(d< 1)
        {
            // director스크립트에 화살과 부엉이가 충돌했음을 전함
            GameObject director = GameObject.Find("GameDirector"); // 추가
            director.GetComponent<GaimDirectorOwl>().DecreaseHp(); // 추가

            Debug.Log("충돌");
            // 충돌할 경우 화살을 지웁니다.
            Destroy(gameObject);
        }
    }
}
UI Button을 만들어서 버튼을 눌러도 움직이게 만들거에요
UI버튼을 만들고 화살표모양 이미지를 넣어주세요. 오른쪽 화살표, 왼쪽 화살표
버튼의 텍스트는 지워주세요
OwlController.cs를 수정할게요
using System.Collections;
using System.Collections.Generic;
using UnityEngine;

public class OwlController : MonoBehaviour
{
    // Start is called before the first frame update
    void Start()
    {
        Application.targetFrameRate = 60;
    }

    // Update is called once per frame
    void Update()
    {
        // 왼쪽으로 1
        if (Input.GetKeyDown(KeyCode.LeftArrow))
        {
            transform.Translate(-1,0,0);
        }
        // 오른쪽으로 1
        if ( Input.GetKeyDown(KeyCode.RightArrow)) {
            transform.Translate(1,0,0);
        }
    }

    public void LButtonDown()
    {
        transform.Translate(-1, 0, 0);
    }
    public void RButtonDown()
    {
        transform.Translate(1, 0, 0);
    }
}
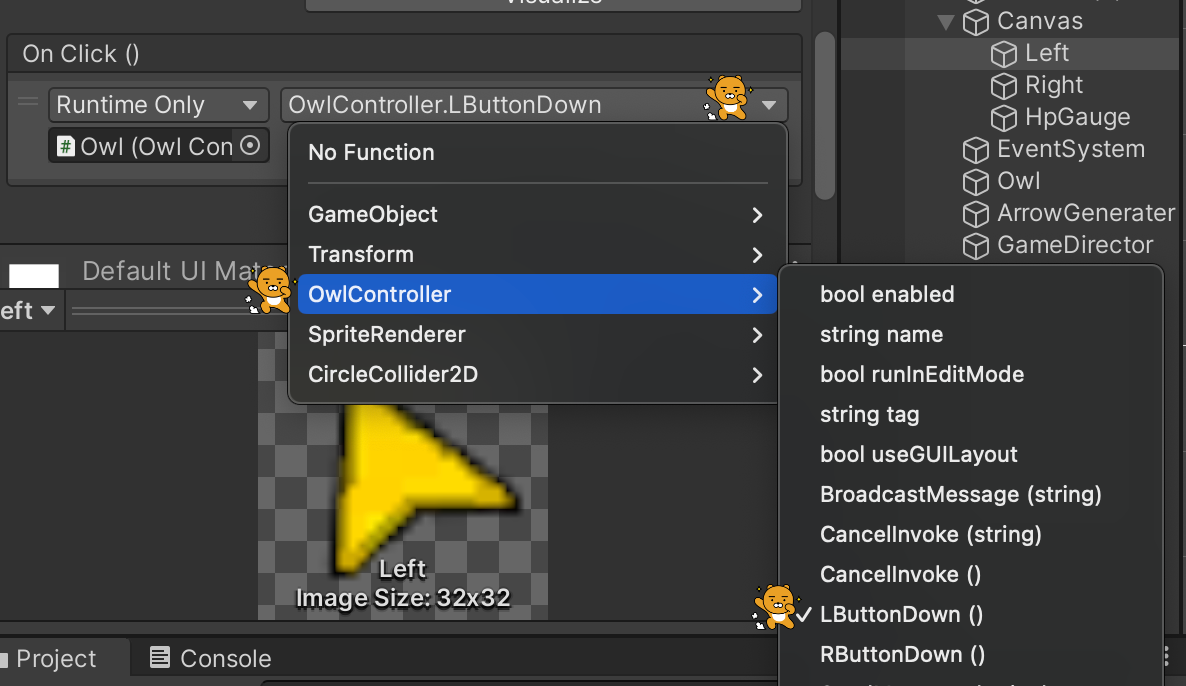
OnClick으로 버튼에따라 움직이게 만들게요
왼쪽 화살표 버튼의 On Click에 + 표시를 눌러 추가해 준 뒤 하이라키의 Owl을 넣으세요
옆의 역삼각형을 눌러서 Owl에 들어있는 스크립트를 선택하고 왼쪽으로 이동시키는 함수 LButtonDown()을 선택해주세요
No Function > OwlController > LButtonDown()
오른쪽 화살표도 왼쪽처럼 하세요


https://youtu.be/n0_5ZRuwVKc
https://github.com/BlueStrobus/UnityCsCode/tree/main/%E1%84%92%E1%85%AA%E1%84%89%E1%85%A1%E1%86%AF%E1%84%87%E1%85%B5%E1%84%85%E1%85%B3%E1%86%AF%20%E1%84%91%E1%85%B5%E1%84%92%E1%85%A2%E1%84%85%E1%85%A1-%E1%84%87%E1%85%AE%E1%84%8B%E1%85%A5%E1%86%BC%E1%84%8B%E1%85%B5
코드 Github에 올려뒀습니다.
'UNITY > Unity Study' 카테고리의 다른 글
| 시간내에 목적지 도달하기 (0) | 2023.08.30 |
|---|---|
| FurBall의 탈출기 (0) | 2023.08.23 |
| 목적지까지 자동차 움직이기 Unity (0) | 2023.08.21 |
| C# (0) | 2023.08.21 |
| 유니티 문법 (0) | 2023.08.19 |


